
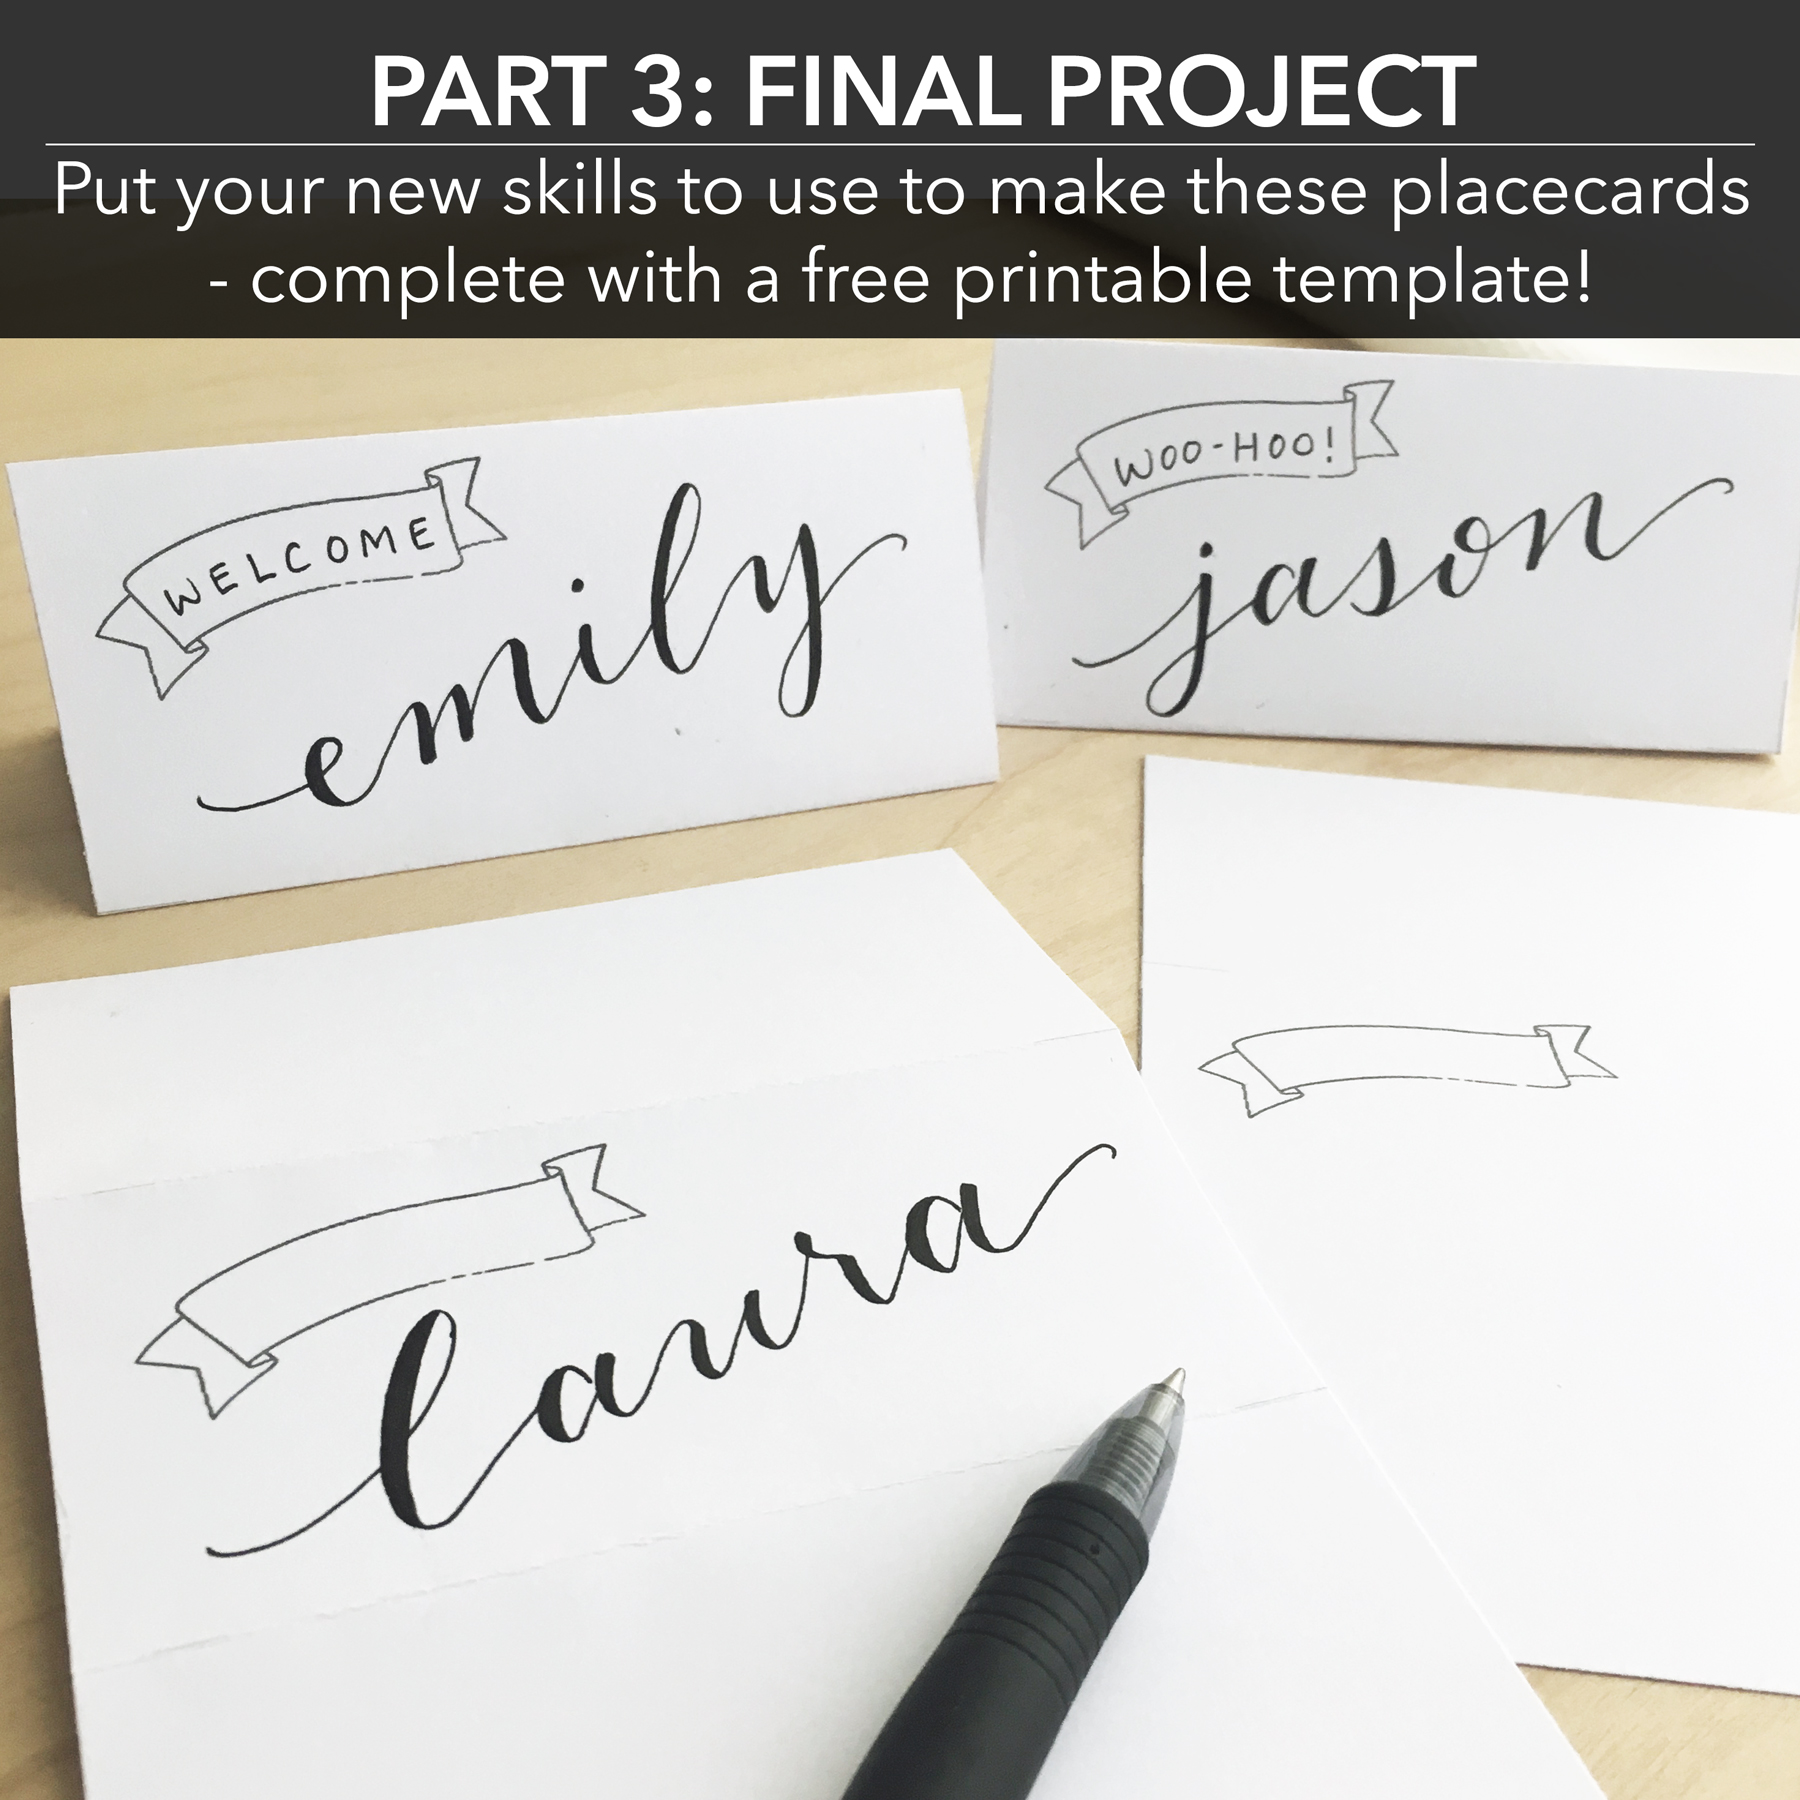
PART 3 - FINAL PROJECT
Let's put those new faux calligraphy skills to use!
WHAT YOU NEED
1) PAPER: Heavyweight Paper or Card Stock is best, but honestly, you can use any kind of paper and these will still look super adorable. You could even try printing these out on colored paper for an extra special touch!
2) PEN: The same kind you've been using to practice your faux calligraphy.
3) PRINTER: Any old computer printer will do
4) SCISSORS
5) SCOTCH TAPE
That's it! A pencil and eraser might be useful if you want to sketch in the names before going over them with pen. But not necessary - this is a super simple project you can whip up in an hour!
WHAT TO DO
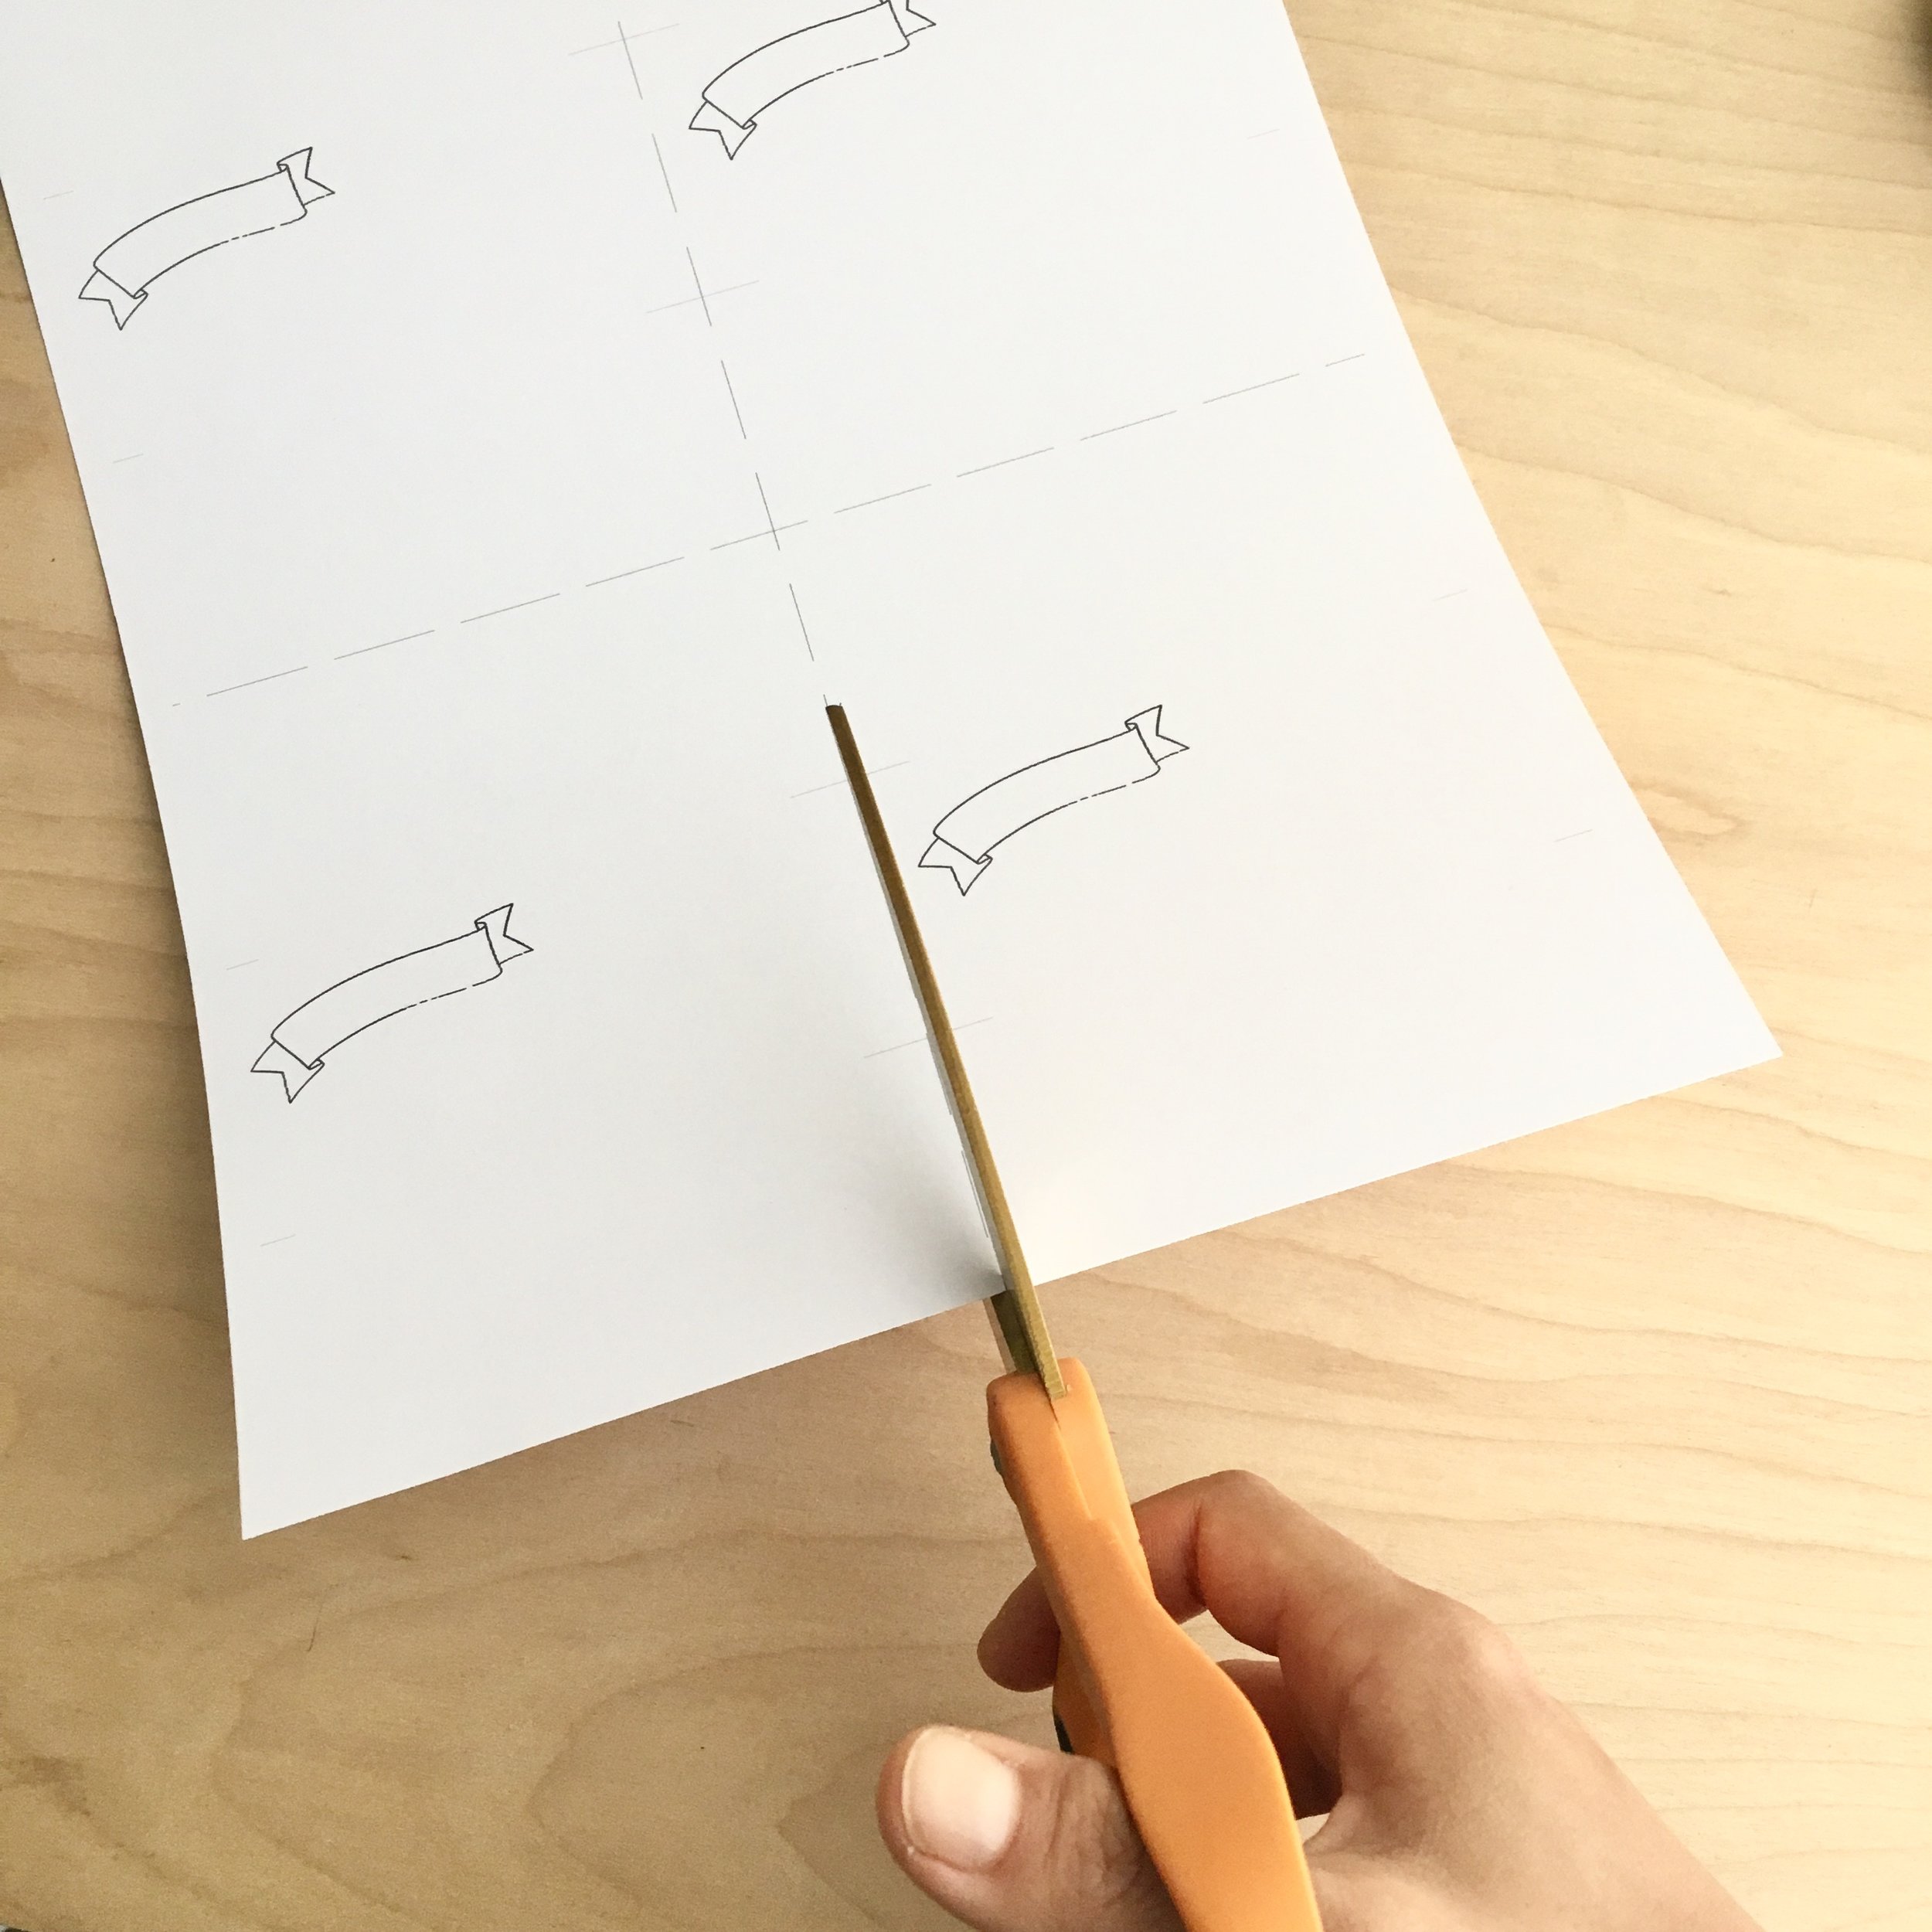
FIRST - Print out the PLACECARDS TEMPLATE PDF
SECOND - Cut along the dashed lines
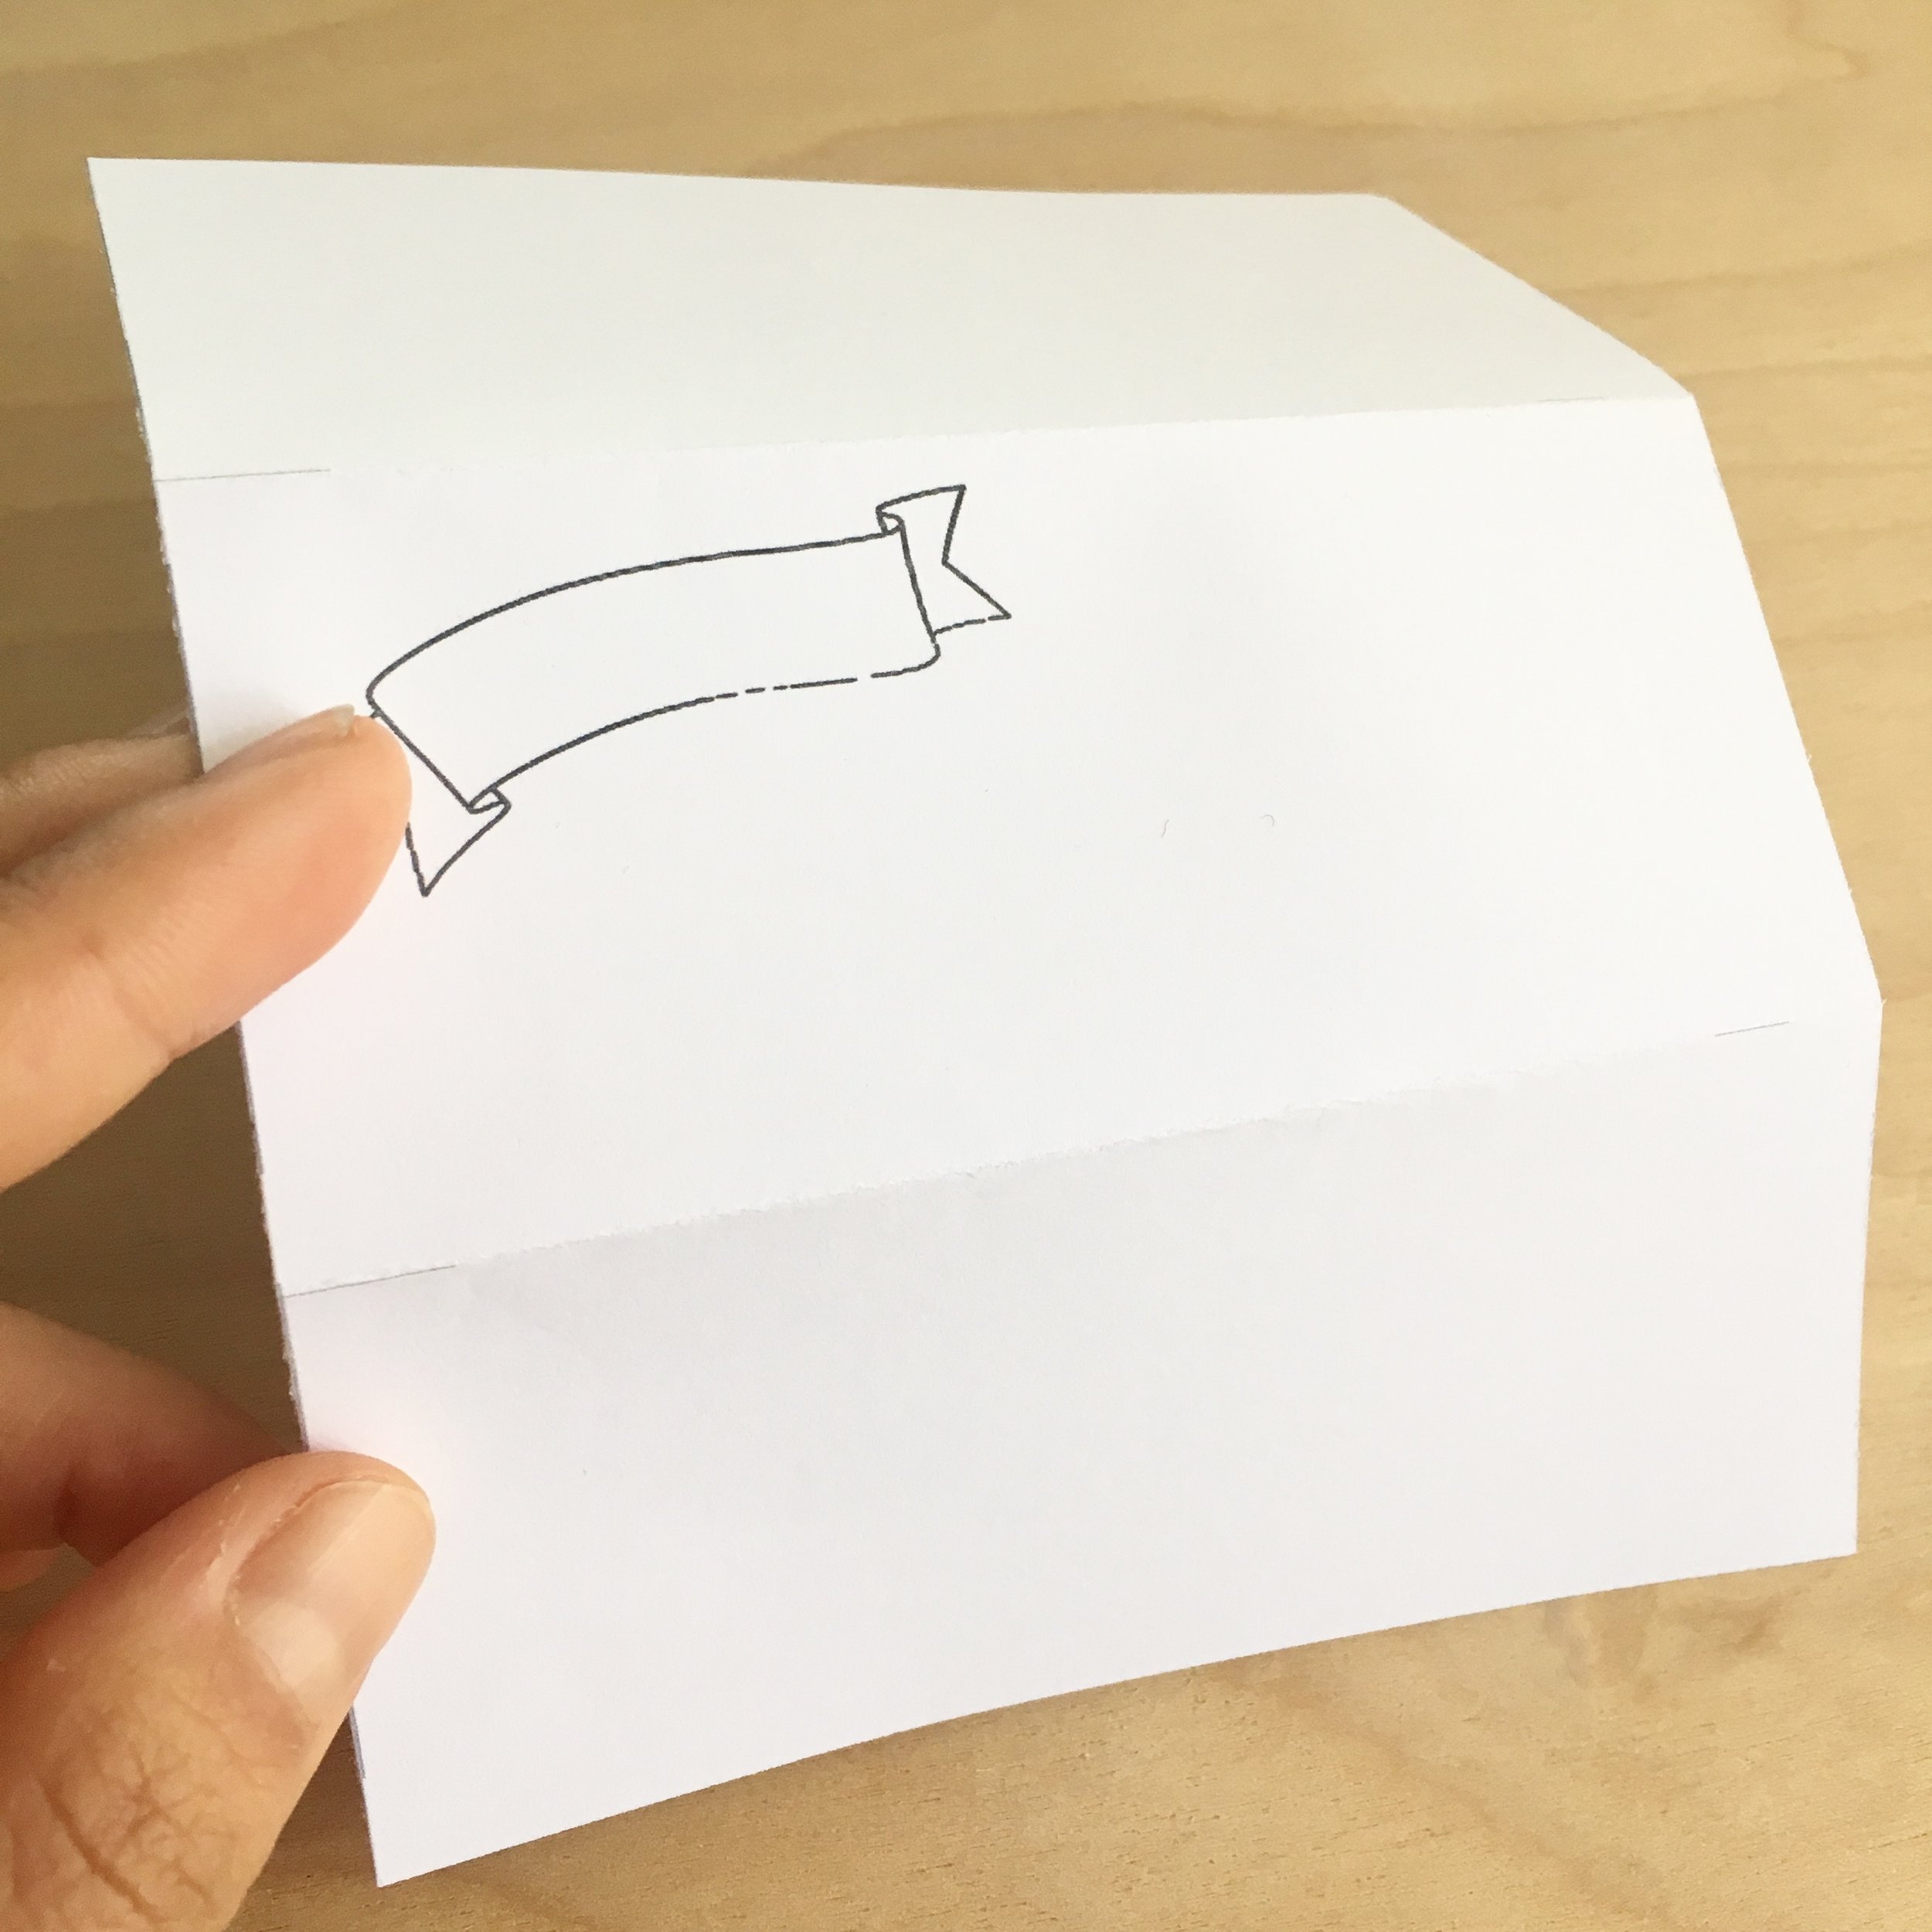
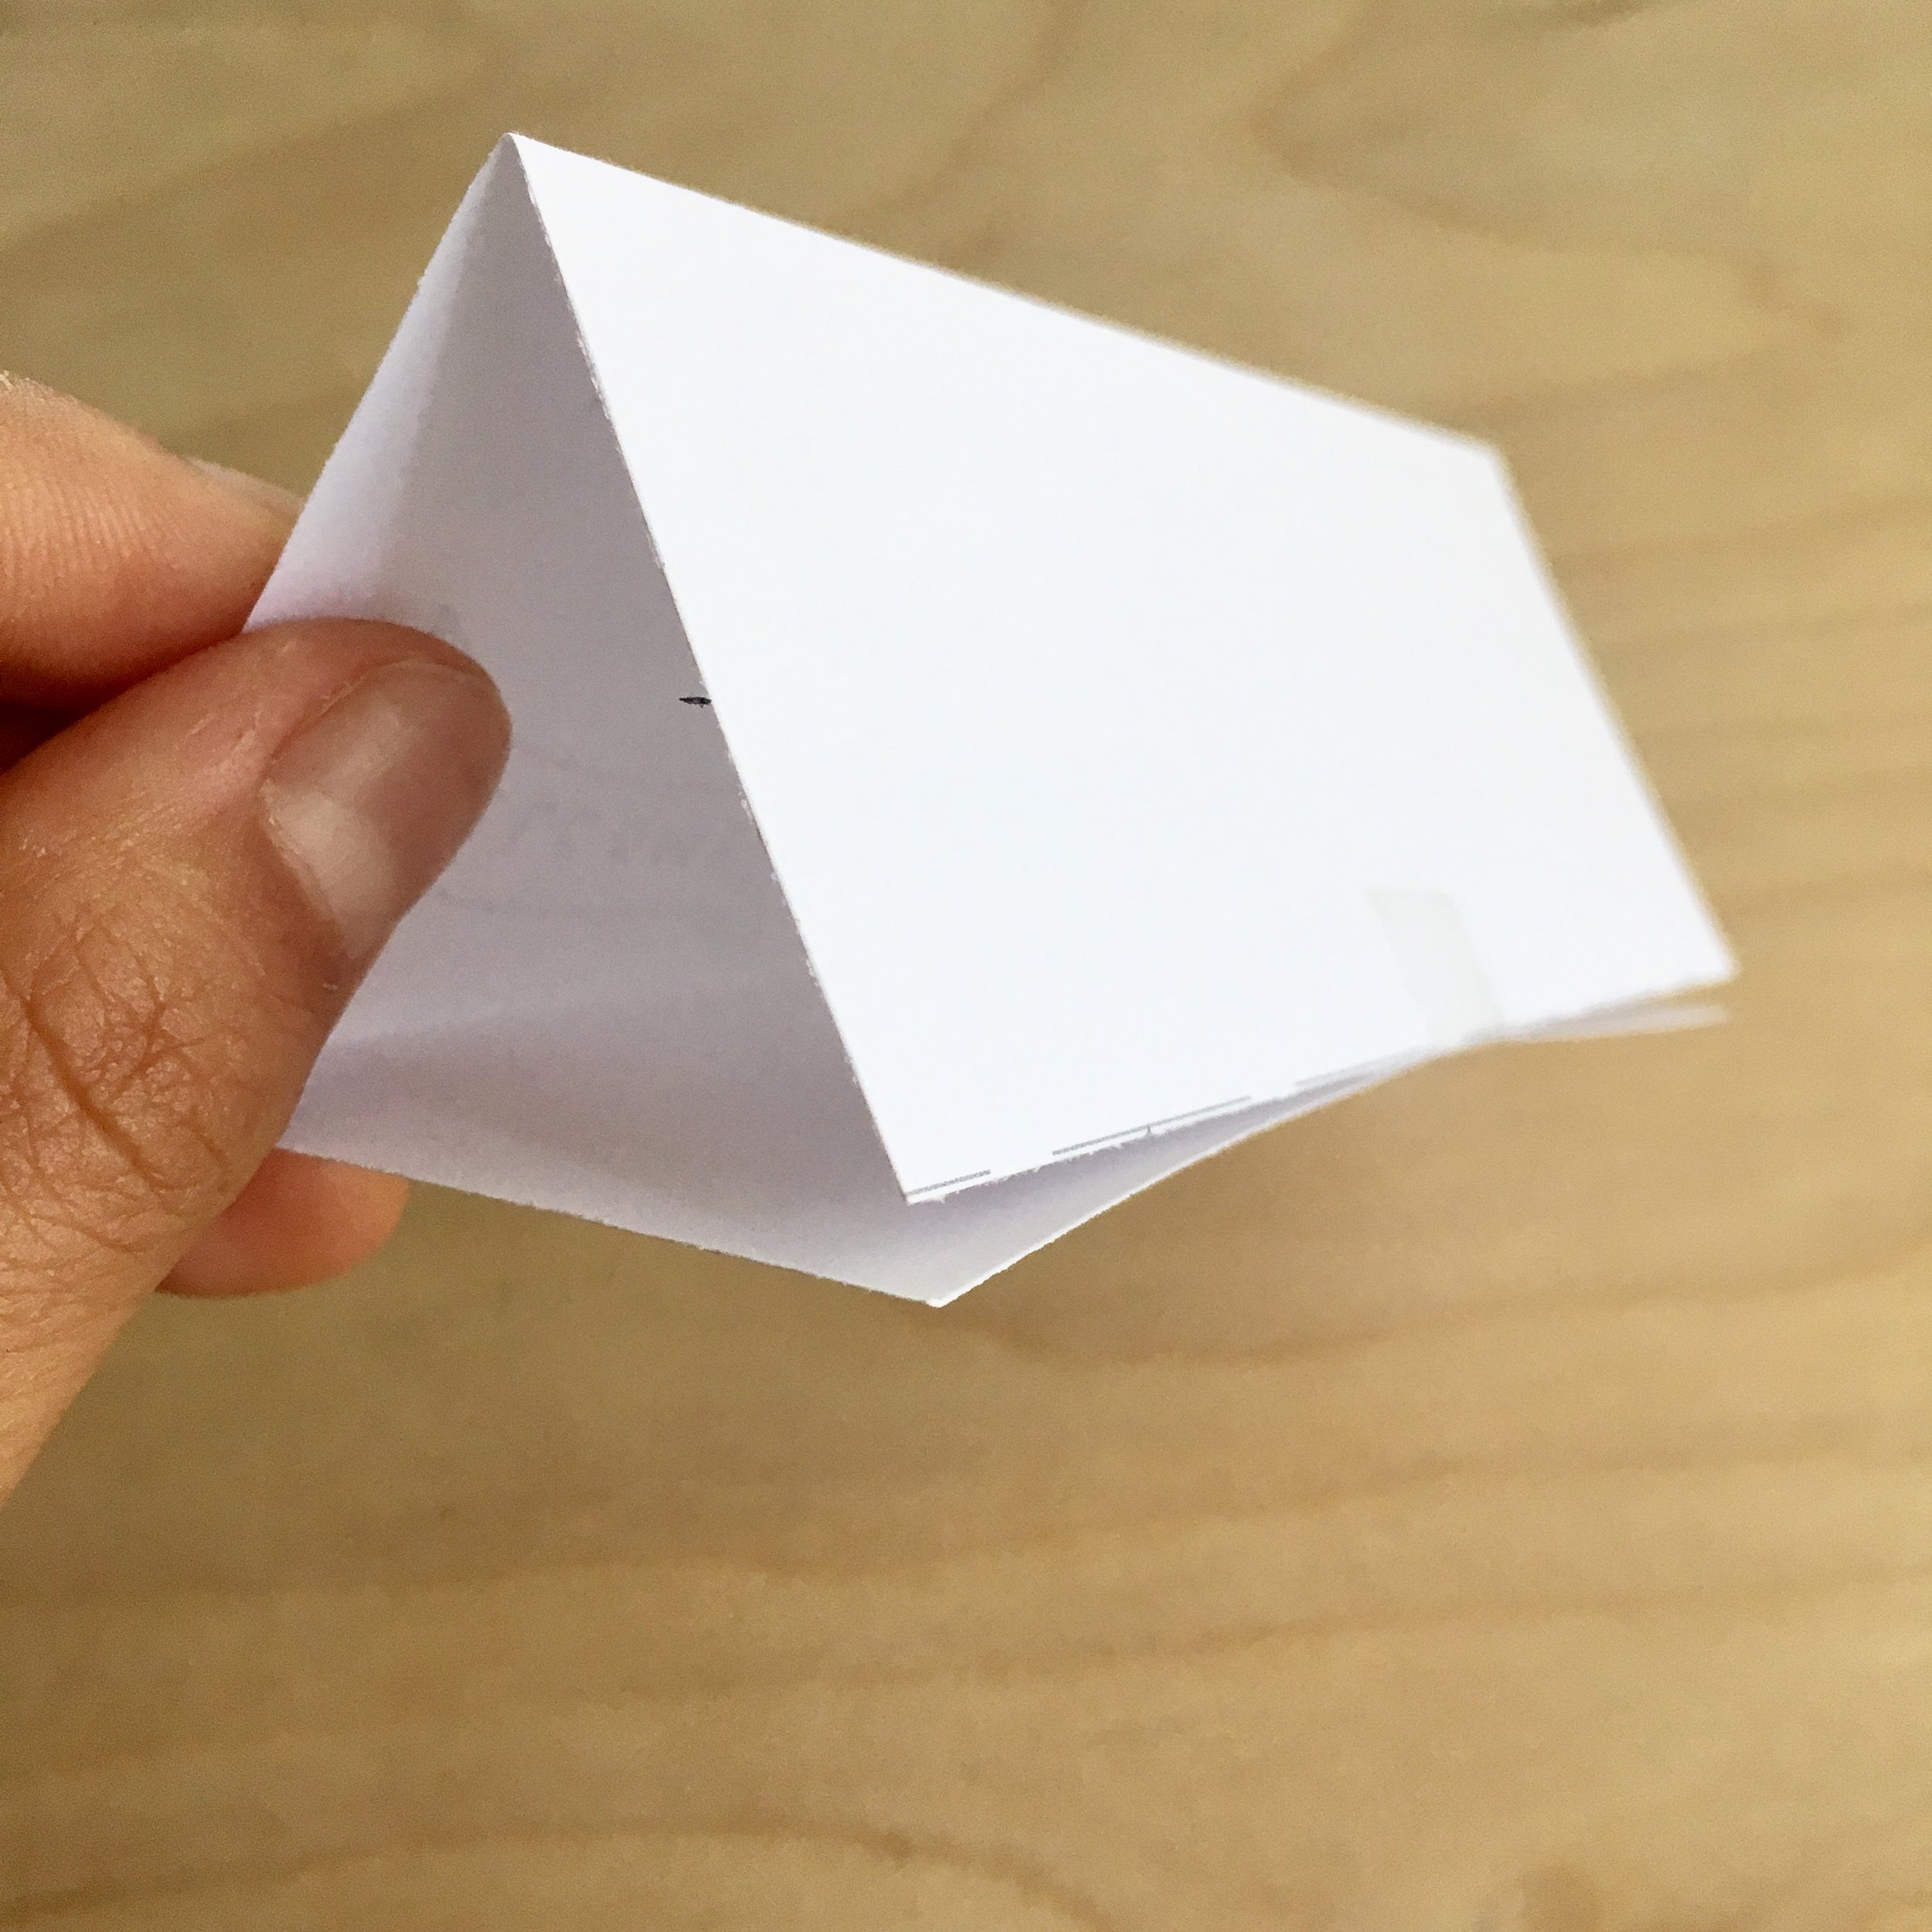
THIRD - Fold each resulting rectangle into thirds, using the tickmarks along the edges as guides
FOURTH - Write a name or message in faux calligraphy on the front
FIFTH - Use a little piece of tape to secure the two loose ends together
TADA! You should have a cute, triangular place card that stands on its own. You can use the banner to write table numbers or a little welcome message.

THE BEST THING ABOUT CALLIGRAPHY
It's a creative, flowing, expressive art form. BUT... it's also super practical!
Once you know how to do it, you'll find SO MANY uses for it. These place cards are just one tiny example. You could create gift tags, cards, envelopes, wrapping paper, and so much other cool shit!
I hope this inspires you to add a little creativity to your life.

Happy Creating!
Wootwoot!
Shinah
PSST..... I'd LOVE to see your work! Tag your faux calligraphy photos with #CALLIGRAFAKE so I can admire your new skillz ;)