Ask any professional calligrapher what their favorite white ink is, and their response will be Dr Ph Martins Bleedproof White.
And I wholeheartedly agree. Before finding Bleedproof White, I tried all sorts of other white inks and they were either too thin and translucent, or clumpy and hard to use.
So I recommend it all the time. But, whenever a student of mine gets a new bottle of Bleedproof White, their reaction is always.... "WTF IS THIS?"
That's because Bleedproof White doesn't come ready to use for pointed nib calligraphy. When you open the bottle, it's almost like a paste...
So here's exactly how I make this ink work for me, without having to wrestle with the consistency all the time.
You can click below to watch the VIDEO TUTORIAL, or keep reading for just the highlights.

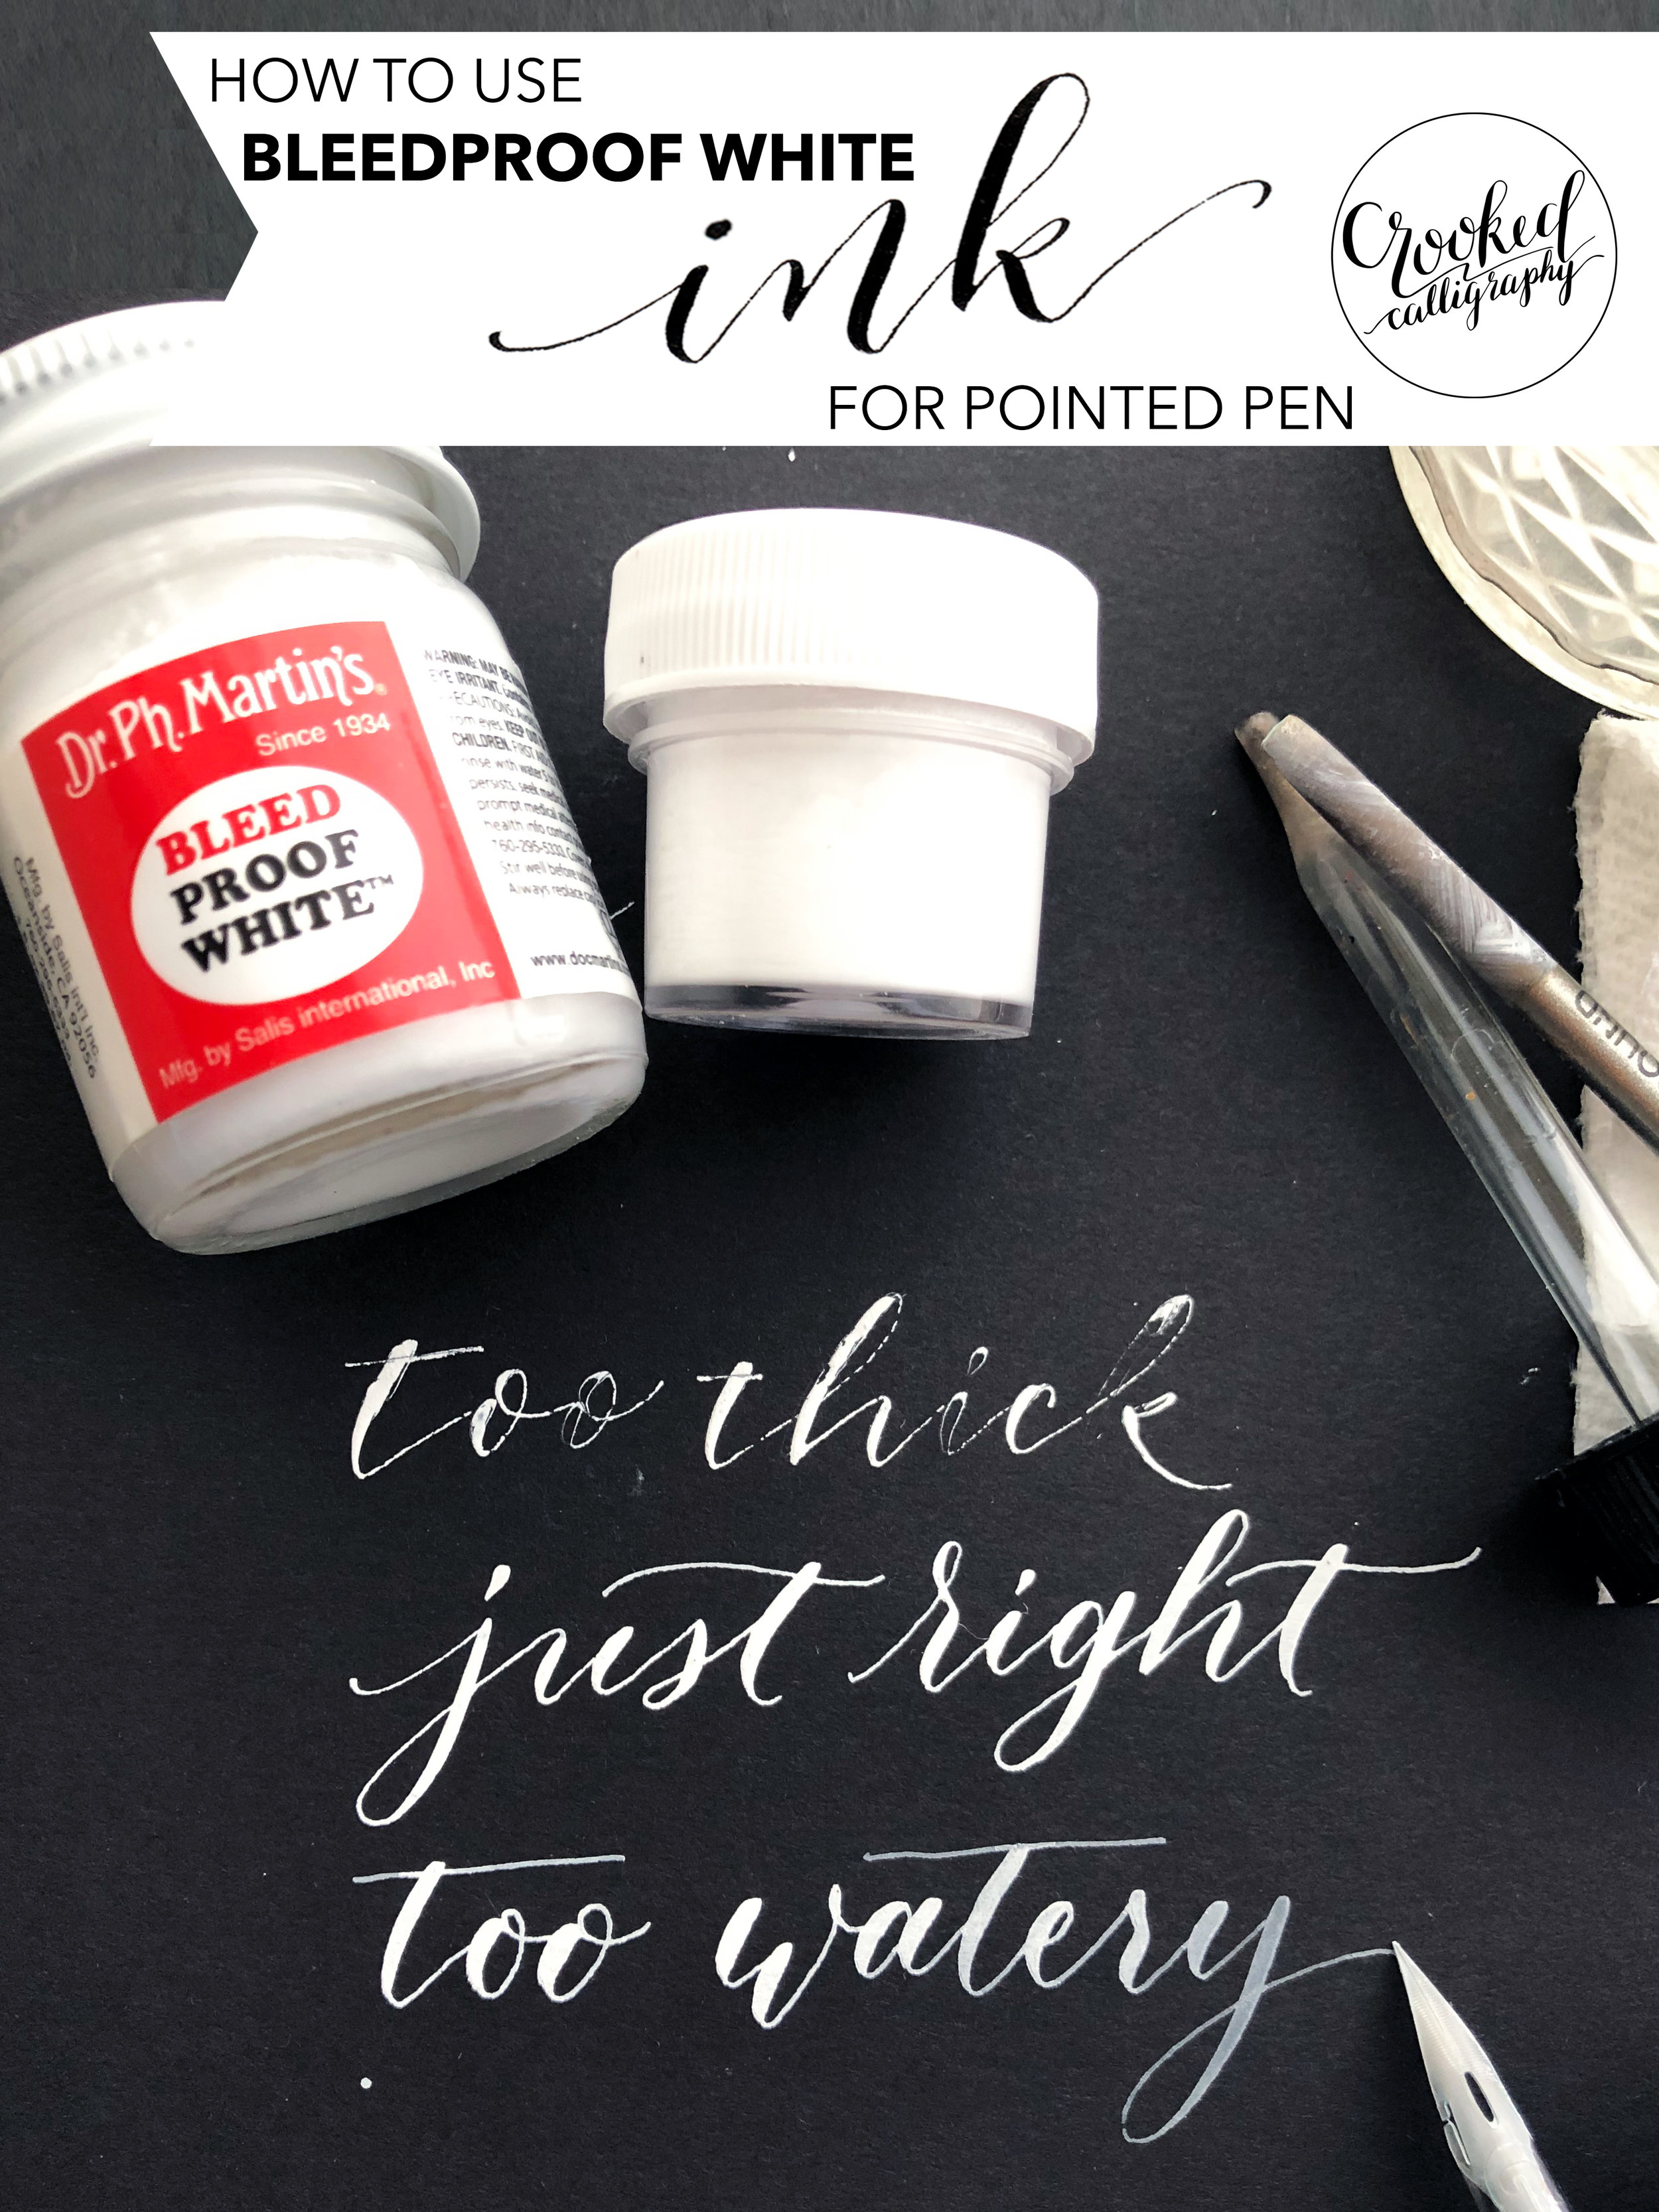
BLEEDPROOF WHITE IS THICK!
When you first open the jar, it’s almost like a clumpy paste, which makes it impossible to use with your pointed nib.
So you need to add water to get Bleedproof White to be thin enough to flow smoothly from your nib.
There are TWO WAYS to do this:

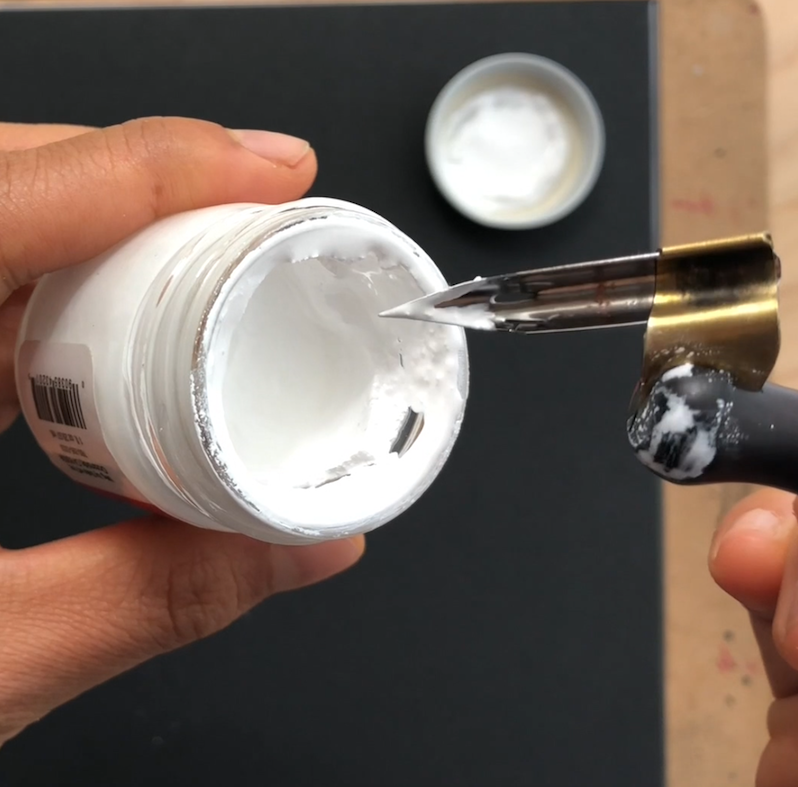
OPTION #1 : ADD WATER DIRECTLY TO THE BOTTLE
Add a few drops of water straight into the bottle and stir JUST THE TOP INCH with a stick (or use the end of a paintbrush like I’m doing.)
PROS: It’s easy and convenient
CONS: It’s harder to maintain the right consistency as you use the ink. The lower the ink level gets, the harder it will be to get your nib all the way down into the bottle.
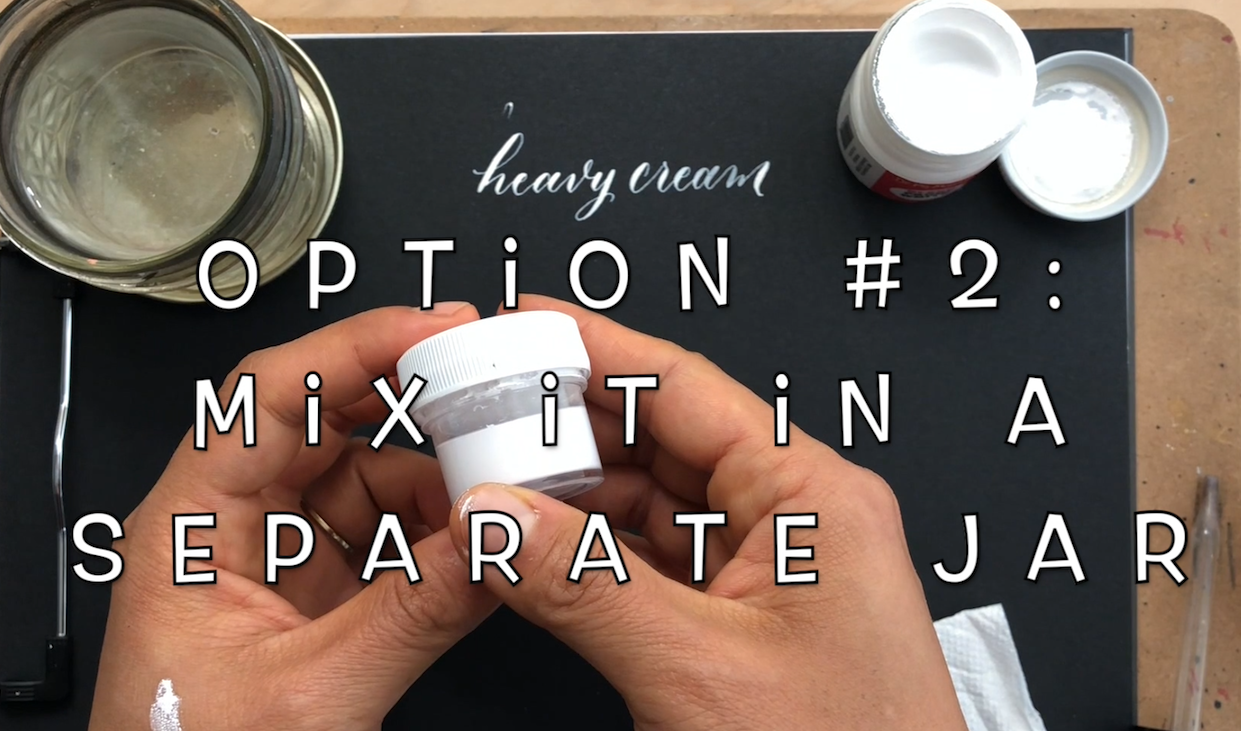
OPTION #2: MIX THE INK IN A SEPARATE JAR
This is what I PERSONALLY do. I scoop some of the thick Bleedproof White into a separate 1/2 oz. jar and add water to that jar to get the right consistency.
PROS: It’s easier to maintain the right consistency and dip your nib when you’re using a smaller jar.
CONS: You need to buy a separate small jar (Don’t worry - I show you exactly where to get these small jars at the very bottom of this post!)
GETTING THE RIGHT CONSISTENCY

Add water a few drops at a time using a water dropper, until you get the right consistency:
TOO THICK: The ink doesn’t flow easily from your nib. You get gaps and skips during hairlines.
JUST RIGHT: The ink flows smoothly from your nib. Hairlines are opaque, smooth and consistent.
TOO THIN: The ink flows too fast from your nib. It dries translucent instead of opaque.

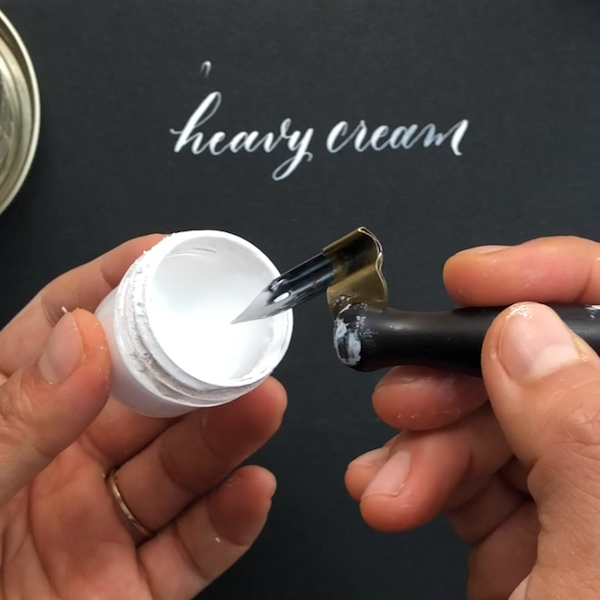
I prefer the consistency of heavy cream, because I like my calligraphy inks to be slightly thicker.
Others may prefer the consistency of whole milk, which is a little thinner but will still work with a pointed flexible calligraphy nib.
There’s no one “perfect” consistency - it will depend on what nib you’re using, what surface you’re writing on, and how hard you press during calligraphy. Don’t be afraid to experiment until you find the thickness that works best for YOU.

So those are my tips for using my FAVORITE white ink, Dr Ph Martins Bleedproof White. It’s a fabulous ink, so don’t be mystified by it! Give it a try and it’ll become a must-have item in your calligraphy toolkit.
I hope this helps you on your calligraphy journey!

YOUR FREE CLICKABLE TOOLS GUIDE!
Wanna know exactly where to get Bleedproof White and the 1/2 oz jars I mentioned above?
I put together a detailed list of all my favorite calligraphy tools, with clickable links so you know where to buy each item.
Click the blue button below and enter your info to join my calligraphy learning email list - as a bonus, you'll get a FREE PDF of all the tools in my Calligraphy Toolkit - so you have all the info you need to get started right.